MobiLinc adds Voice Control

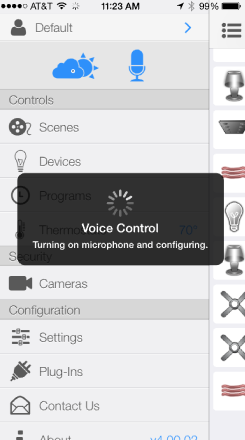
MobiLinc, my current favorite iOS app for controlling Insteon systems, has recently added voice control. Until iOS allows access to Siri for easy application integration, the feature isn’t ideal since you need to start up the app and turn it on by tapping the microphone icon:
mobilinc-microphone

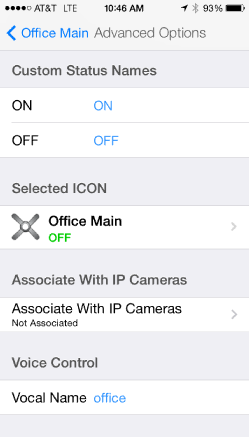
It’s a little gimmicky (but then, I find Siri a little gimmicky and know a lot of people who love that feature) – but it works well, and can be used to control scenes, devices, and programs by going to the advanced options and specifying a “vocal name” for the thing you want to control:
mobilinc-voice-control

Gimmicky or not, how cool is it to be able to talk to your home control system without having to click through a bunch of buttons and options?
Read more ›

Posted by Matt Chiste
March 22

Insteon-enabled your garage doors

We’ve controlled lights, checked our mail, connected our doorbell, and wired our smoke detectors, so let’s take a look at another device to connect to our Insteon system: the Insteon garage door control and status kit.

Really, this device is just an Insteon I/O Linc, which we’ve already covered before, with some wire and a magnetic contact closure similar to the one found in the TriggerLinc; it just all comes bundled in one package.

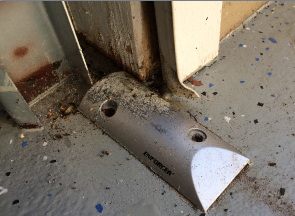
Setting this up is pretty straight-forward: the idea is you put the magnet on the door (I put mine inside the weatherstripping on the bottom) and secure the sensor where it will come in contact with the magnet when the door is closed.
insteon-garage-door-sensor

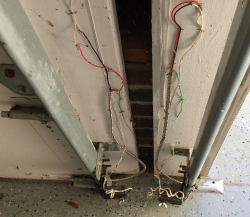
Next you’ll run the wiring up the wall to the outlet that the garage door is plugged into.
insteon-garage-door-wiring
Read more ›

Posted by Matt Chiste
March 16

Cao Gadgets wireless smart tags

About a year ago, as I was considering various ways to save energy, I thought about installing air duct dampers at various points of my A/C system to control temperature with more precision throughout the house (rather than just the 1- or 2-zone systems common today). My plan was to control these dampers with an Insteon I/O Linc so I could manage all the zones via Insteon, such as “shut off the A/C vent in the guest room when it’s not needed”. I’ve since implemented a whole-house energy saving plan by automatically powering down the A/C when I’m not home, but this idea was to go above and beyond that: I was going to have a thermostat in every room to allow for much more precise control of heat and A/C.

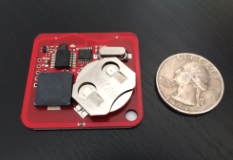
That’s when I found the Cao Gadgets wireless smart tags. They are these tiny, neat little devices that measure temperature and motion, and report that information up to the cloud for alerting purposes. So for example, you could put one in your refrigerator to alert you when the door is open or the temperature rises above a critical level.
cao-smart-tag
Read more ›

Posted by Matt Chiste
March 12

Build a tiny, cheap media center with a Raspberry Pi

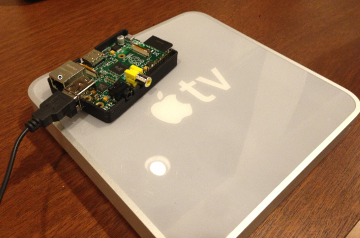
XBMC is my favorite media center software. It’s open-source and runs on just about anything from old Apple TVs to full-blown computers. But the cheapest device available to run it on is probably the Raspberry Pi. They’re not the most powerful, and won’t be able to play everything (1080p and/or multi-channel audio tends to cause some choppiness, for example), but they’re still pretty solid and can easily be installed behind a wall-mounted TV or inconspicuously in your media center cabinet – compared to the original Apple TV, they’re downright tiny:
apple-tv-raspberry-pi

Setting things up isn’t incredibly hard, but it does involve a bit of legwork. Lifehacker ran a great article on how to Turn a Raspberry Pi into an XBMC Media Center under 30 minutes, so I won’t re-hash all of the gory details again. Instead, I’ll offer some tips based on my own experience: Read more ›

Posted by Matt Chiste
March 8

Blink house lights when your smoke alarm goes off

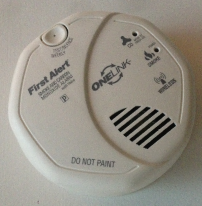
Smoke detectors are a great investment in protecting your home; the First Alert devices with ONELINK allow all detectors in your house to connect to each other, so when the one in the basement goes off all the others are triggered as well, with a voice indication of where the problem is detected. With the Insteon Smoke Bridge, these detectors can be integrated with your Insteon system to provide even more notification options in the event of an emergency.
first-alert-insteon

You could send alerts via PushOver to your phone when an alarm occurs, and even write location-specific events for specific conditions, such as notifying a neighbor that the smoke alarm is going off and you are not home.

Another option, since your entire house is Insteon-enabled, would be to blink specific lights inside or outside of your home to draw attention to the problem for neighbors or emergency responders (you could also blink your lights if an intruder is detected when you’re not home for the same reason).
Read more ›

Posted by Matt Chiste
March 4

The true cost of 3D printing with the Makerbot

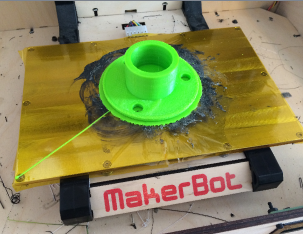
Earlier this week we walked through the design of a plastic replacement part for a snowblower, and someone asked the question: “Couldn’t you just buy a replacement part for much less cost and effort?”. First, in some cases this would be true, but in this particular case, my neighbor searched high and low for the part and couldn’t find one. So a commercially available part may not always be an option, or you may truly need something custom. The cost part of the question got me thinking, though: how much did this thing actually cost to actually print? Turns out that very dense part was under $2 in variable costs (plastic and electricity), and way too much in fixed costs. Here are my calculations.

Plastic
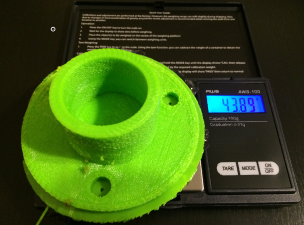
The plastic known as PLA filament used by the MakerBot varies in cost, but figure around $40 for a 1kg spool. So how much did that part cost me in plastic? Using a cheap digital scale, I came up with a weight of about 44g including the raft (the build platform the object is printed on):
makerbot-weight
So, that’s a surprising 4.4% of the spool, which works out to about $1.76 per object, with the ability to print about 22 of them per spool. This is definitely on the high side cost-wise because I used a very heavy amount of “infill” for this part, using much more plastic by making it less hollow than the default setting.

Electricity
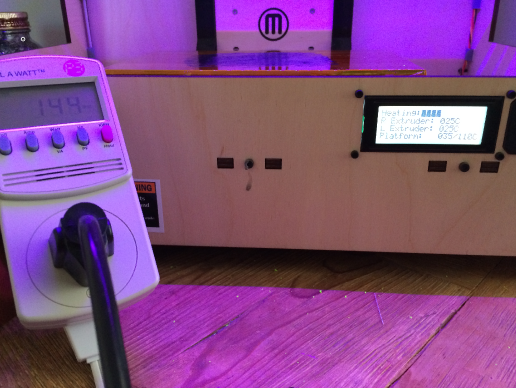
The MakerBot works by melting that plastic filament and shooting it out of an extruder, while moving motors to position the head and lower the build platform. So it has to use a lot of electricity, right? Turns out, not really. I used a Kill A Watt meter to monitor power consumption during heating and printing, and saw ranges from about 140 watts during heating to 180 watts during full printing. The entire print used about .59 kWh, which means it burned about 7 or 8 cents of electricity.
makerbot-killawatt
Read more ›

Posted by Matt Chiste
February 28

Designing 3D Parts with Autodesk 123D Design

The MakerBot 3D Printer is a pretty cool piece of technology that we’ve covered before. 3D printing technology continues to advance, as seen in this excellent infographic on ComputerScienceHub.org. While it still has a long way to go before we’re all printing our own cell phones at home, designing and printing plastic 3D parts is well within reach.

Thingiverse is a site that allows anyone to download ready-made 3D models for printing (I’ve put some of my own up there and written about them here), but today we’re going to talk about the steps to actually design your own parts. Specifically, a neighbor recently had a part break on his snow-blower and asked if I could print a replacement part.
0-broken-part

The results speak for themselves, but not without caveat: unfortunately this part isn’t quite as strong as the original and has cracked a few times. I’ve evolved the design (using chamfered edges) and printing method (more plastic in-fill) over time, but this post is more about the design of the part itself.
0-finished-product
Read more ›

Posted by Matt Chiste
February 24
 Subscribe to HomeAutomationGuru.com
    Add to Google Reader or Homepage

Enter your email address to subscribe: