For those of you that follow this blog, you’ll see things are starting to come together now. We’ve discussed the powerful ISY994i at length, covered some programming concepts, installed some security cameras, added our doorbell to our Insteon network, and even have the system send us a text message when the doorbell rings.
A while back, I suggested purchasing the Universal Devices Network Module to expand the functionality of your ISY-994i. Today I’ll give you an overview of how the pieces could fit together to include a picture of WHO rang the doorbell in text message. I find this feature remarkably useful even when I’m at home because I despise dealing with door-to-door magazine con artists “salesmen”: if the person ringing the doorbell is carrying a clipboard and not wearing a girl scout uniform, I don’t even bother opening the door (that sentence isn’t creepy right? I just like girl scout cookies…).
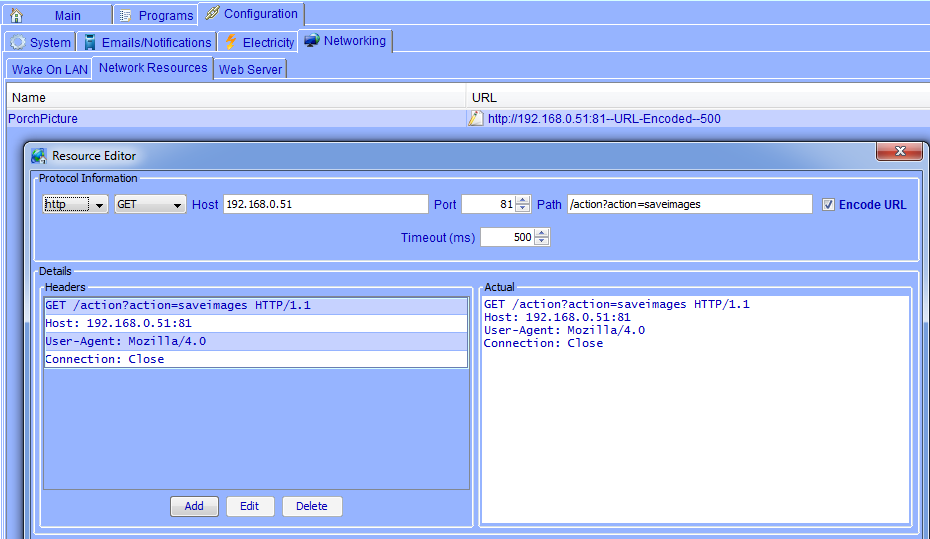
The challenge we have to deal with is that the ISY-994i can’t really run arbitrary programs or save local files, so we can’t really have it do the actual work of capturing the picture. Instead, we’re going to use a separate program running on a Windows computer that essentially does a single thing: “When a special URL is called, capture 5 images from the Blue Iris web interface and save them to disk so they can be accessed later.”. Then, we use the ISY994i’s Network Module to call that URL:
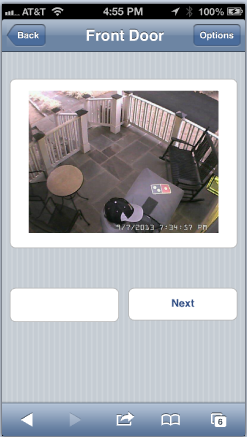
The end result is a link in the text message that allows you to view your visitor when they ring the bell, like this awesome guy:
Honestly the setup for all this is a bit beyond the scope of this blog because it involves an always-on computer and some programming skills, so it isn’t a very easy setup. If you’re interested in help doing this on your own, leave a comment here or drop me a line and I’ll try to help out however I can. At some point I may open source my home automation application, and will update this post when I do. In the meantime, if you’re a java developer, the below code may help you out a bit to get started:
	private String captureImage() {
		String fileName="";
		String responseText = "";
		Image image = null;
		try {
		    // get the image from Blue Iris
		    URL url = new URL(PrefsHelper.getPreference("image.capture.url"));
		    image = ImageIO.read(url);
		    fileName = PrefsHelper.getPreference("image.save.folder") + (PrefsHelper.getPreference("image.file.prefix","")) + (new Date().toString()).replaceAll(":", "_").replaceAll(" ", "_") + ".jpg";
		    File outputFile = new File(fileName);
		    // save the image to the defined path
		    ImageIO.write((RenderedImage) image, "jpg", outputFile);
		} catch (IOException e) {
			responseText += " Exception: " + e.getMessage();
		}
		responseText = "<BR>"+fileName;
		return responseText;
	}

	public void captureImages() {
		String responseText="";
		// capture the images, with a defined delay between each image
		try {
			imagesToCapture = PrefsHelper.getIntPreference("image.count", imagesToCapture);
			delayCount = PrefsHelper.getIntPreference("image.delay", delayCount);

			responseText = "<br><br>saving images...<br>";
			for (int x=0; x<imagesToCapture; x++) {
				responseText += captureImage();
				Thread.sleep(delayCount*1000);
			}
		}
		catch (Exception ex) {
			responseText += "Exception: " + ex.getMessage();
		}
		return responseText;
	}


