Continuing with the theme of setting up a smarter doorbell, let’s take a look at programming the ISY-994i to send a text message and/or email when the doorbell rings, so that we are aware of package deliveries or other visitors when we’re not necessarily within earshot of the chime.
The first thing we need to do is set up the Emails/Notifications section in the ISY-994i. We need to tell it how to send emails, who to send emails to, what the content of those messages should be, and when to send them.
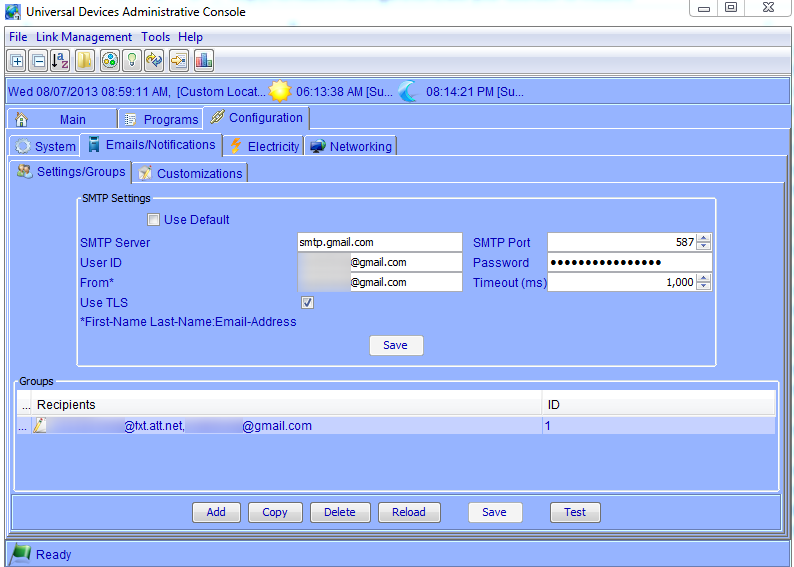
How to send emails. In the ISY-994i admin interface, go to the “Configuration” tab, then “Emails/Notifications”, and define the values for your mail server under the “Settings/Groups” tab. For example, if you have a Gmail account, you’ll use smtp.gmail.com for the “SMTP Server” value and 587 for the “SMTP Port”. Your “User ID” and “Password” will be your full Gmail address and password (or, if you’re using the 2-factor authentication, which you should, it will be the “Application-Specific Password” – learn more about this here). Also check the “Use TLS” box.
Who to send emails to. Next, you define “Recipients” by clicking “Add” at the bottom of the screen. Here, if you want to receive a text message and you’re on AT&T, just enter {10-digit phone number}@txt.att.net (other carrier suffixes can be found here). You can also receive regular email, and if you’d like a notification to go to two different addresses, separate them by a comma. For example:
1234567890@txt.att.net,mymail@gmail.com
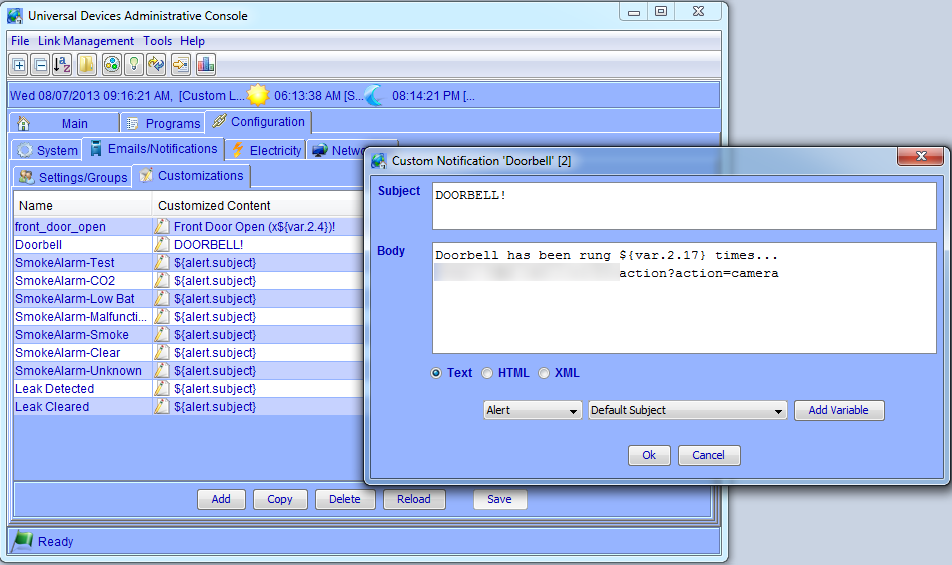
What the content of those messages should be. Next, click on the “Customizations” tab. Here you’ll click “Add” and enter a subject and body. In addition to being able to enter any arbitrary text, there are also variables that are available on the Notification screen that you can use to inject custom text into your message. For example, I have a variable defined that keeps track of how many times the doorbell has been rung (don’t ask why), and I include that variable in the text of the messages sent. I also include a link to the picture of who’s at the front door, but we’ll cover that another time.

When to send them. Finally, now that we have the how, the who, and the content, we need to define when to send these messages. You do this in the “Programs” tab. Expanding on our original doorbell program that would sound the chime when the button is pressed, we now have a few additional lines:
If
      Status 'Sensor-Door Bell' is On
Then
      Set 'Output-Door Bell' 100%
      Send Notification to 'TextMessage' content 'Doorbell'
      $doorbell.push += 1
      $doorbell.push Init to $doorbell.push
The “Send Notification” line is where you specify the “recipient” (in my case called ‘TextMessage’) and the “content” (‘Doorbell’). The other two lines increment a variable called $doorbell.push by 1, and save back the Init value. The idea behind saving back the initial value is that if the ISY-994i loses power or is reset, the variables are reset to the last “Init” setting, so every time we increment the counter, we want to preserve that value in the event of a reset.
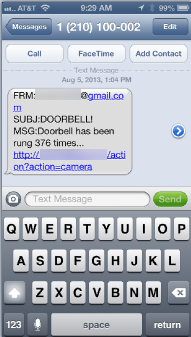
… and that’s it! Now when someone rings the doorbell, you’ll get a text message and/or email:


