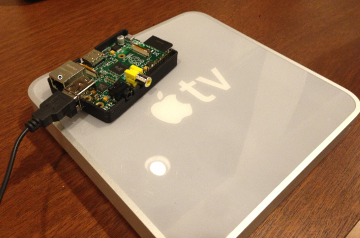
XBMC is my favorite media center software. It’s open-source and runs on just about anything from old Apple TVs to full-blown computers. But the cheapest device available to run it on is probably the Raspberry Pi. They’re not the most powerful, and won’t be able to play everything (1080p and/or multi-channel audio tends to cause some choppiness, for example), but they’re still pretty solid and can easily be installed behind a wall-mounted TV or inconspicuously in your media center cabinet – compared to the original Apple TV, they’re downright tiny:
Setting things up isn’t incredibly hard, but it does involve a bit of legwork. Lifehacker ran a great article on how to Turn a Raspberry Pi into an XBMC Media Center under 30 minutes, so I won’t re-hash all of the gory details again. Instead, I’ll offer some tips based on my own experience:
- Power. I kept consistently having “green snow” show up in the HDMI output, and pulled my hair out for a long time. There’s a line in the guide that indicates you “may have problems” with low-quality power supplies, and it turns out that’s exactly what was biting me. I’d recommend using an even higher-rated power supply like this 2A micro USB wall charger
to avoid any problems. You can probably also use an old iPhone charger (which is rated at 1 amp) with a micro-USB cable
, but if you have any issues – even if the thing looks like it’s booting up fine – start your diagnostics with the power supply.
- OpenELEC. Installing Raspbmc didn’t work for me – the USB drive just kept getting wiped out and the installer didn’t work at all. Fortunately, Raspbmc isn’t the only game in town, and I went with OpenELEC, which has a well-documented install process that actually worked for me. Keep in mind that basically these installation packages are pretty much just wrappers around XBMC with a few additional features thrown in, so by and large whatever installation utility you use your end experience with XBMC will be the same.
- Keyboard. You likely won’t use it much after everything’s set up, but this tiny keyboard
is nice to use for the initial setup, and if you’re controlling your XBMC with a regular TV remote, it will help when you’re trying to search for YouTube videos without having to use the on-screen keyboard.
- Remote. It’s incredibly pricey, but I love the Logitech Harmony One Advanced Universal Remote
remote for being able to control all devices at once in the media center without having to switch remotes. You’ll still need an USB IR receiver for the Pi, and if you get this one
for $7, they’ll throw in a remote for free (or the other way around, whatever…).
- iPhone Control. I rarely even use my remote or keyboard when controlling the XBMC now. Instead, I use the phenomenal iPhone/iPad app XBMC Commander. It’s got a great interface for remotely controlling the menus, but even better it allows you to scroll through your music and movies directly on your device so you don’t need to wade through menus on the TV.
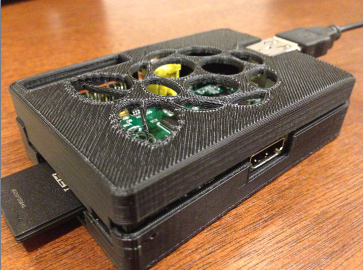
- Case. Out of the box, the Pi is an exposed circuit board. If you’re placing where any metal can come in contact with it, you’ll definitely want a case to prevent any shorts. There are a bunch of cases on Amazon
, but if you have access to a 3D printer, here’s a great design you can download for free. Not the prettiest thing in the world, but it protects the electronics while allowing air flow for cooling.