Automate your toilet

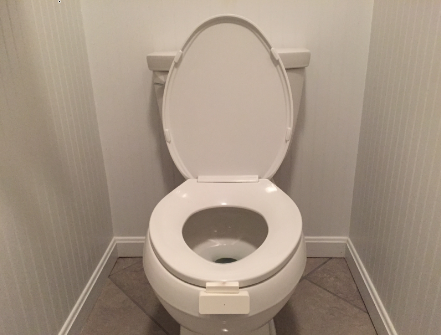
The Insteon TriggerLinc is a great device for sending basic open/close information to your Insteon system. It’s not as discrete as the hidden door sensor, but it gets the job done. And, it doesn’t have to be used for just doors or windows.

Behold, the latest in home automation technology:
toilet-triggerlinc

… and the associated code for your ISY-994i:

Lid Up

If
  Status 'ToiletLid' is On
Then
  Run Program 'AlertEVERYONE' (Then Path)
Else
  - No Actions

Lid Down

If
  Status 'ToiletLid' is Off
Then
  Stop Program 'AlertEVERYONE'
Else
  - No Actions

AlertEVERYONE

If
  - No Conditions
Then
  Wait 60 Seconds
  Send Notification to 'TextMessage' content 'HolySweetBabyJesusHeDidntPutTheSeatDownAgain'
Else
  - No Actions

Read more ›

Posted by Matt Chiste
April 1

Install an SSL proxy for secure video feeds

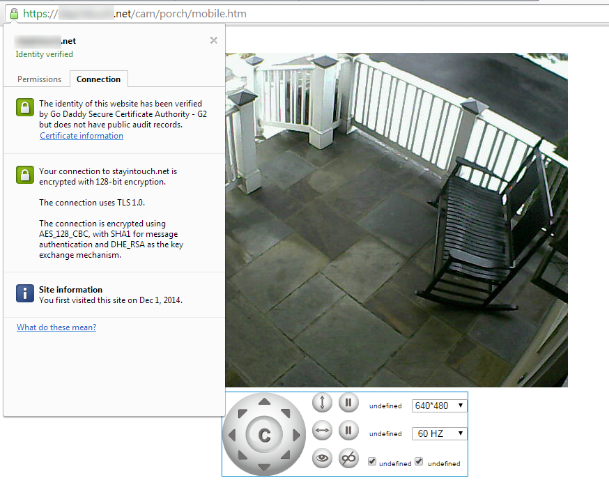
We’ve covered Foscam security cameras and this Trivision 1080p model, and have even discussed a good way to access these cameras remotely with a personal VPN connection. If a personal VPN isn’t in the cards for you but you’d still like to connect to your cameras securely – and you have an “always on” computer – you can set up an SSL proxy to secure those feeds (or at very least, secure access to Blue Iris, which in turn will load the feeds).

The core problem is that the firmware on these cameras is usually pretty weak, and I’ve yet to see the ability to encrypt camera feeds with SSL. This means that if you open up your router so that you can access your camera remotely on the Internet, the traffic isn’t encrypted and is vulnerable to someone else “sniffing” it to gain access to your cameras. Creepy, right? A VPN solution would be the most secure, and your mileage may vary with the proxy approach described here (for example, it doesn’t work with the ISY994i or the Trivision model for various technical reasons), but it’s certainly better than nothing and can applied in a variety of situations. For example, it’s an approach I use to secure my Intellihome traffic.

The steps for setting this up are below, with the end result being the ability to access your private internal systems with a secure “https://” URL from the public Internet:
4_ssl_working Read more ›

Posted by Matt Chiste
February 23

Installing an outdoor security camera

Foscam cameras are great for indoor and outside covered areas, but I recently wanted to step up my security camera game by adding a high-res camera high on an outside wall exposed to the elements. I chose this TriVision 1080P outdoor WiFi camera, and got to work figuring out how to get power to where I wanted it.

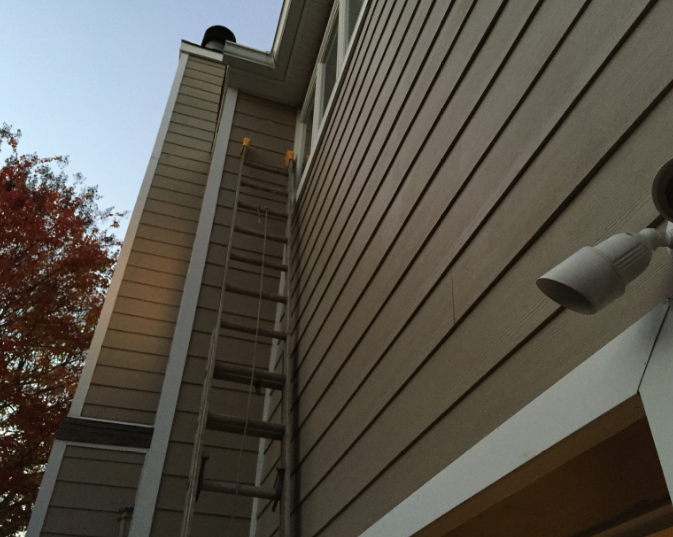
The location I chose was really high on the wall just under the roof eave.
camera-ladder

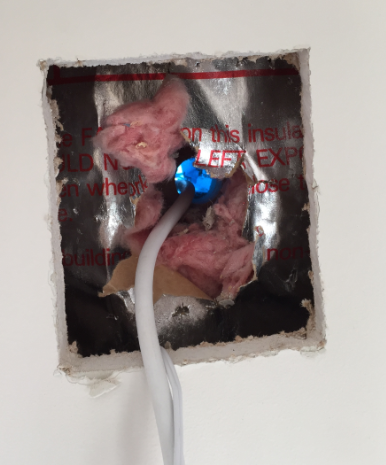
At first I planned to run power through the attic and go down, but that part of the attic was pretty inaccessible since my attic has 16 inches of blown-in insulation I got after a home energy audit, making it really hard to find studs to walk across. Then I realized that I actually had a power outlet on the other side of the wall in the bedroom. So after cutting open a patch of drywall and drilling a hole through the outer wall (and insulation), I had the power run for the camera going through to the outside (sealing the hole with foam to preserve the insulation).
power-through-wall

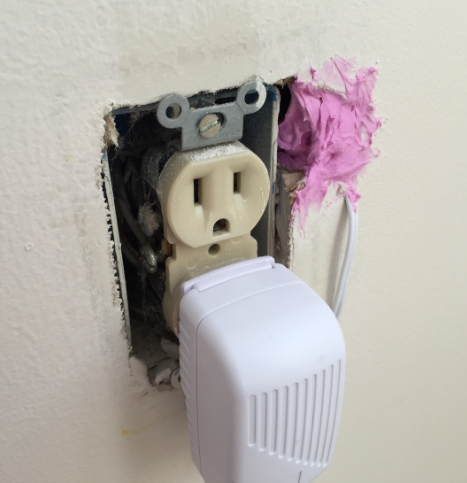
Next, (after cutting the power for safety), I plugged in the DC adapter to the outlet, and bored a little hole next to it to run the low-voltage wiring inside the wall (sealing the hole with spackle, shown roughed-in here):
camera-power Read more ›

Posted by Matt Chiste
January 27

Cutting drywall safely

Cutting Drywall isn’t all that difficult, and we’ve talked about it in the past few posts. Because you never know what’s behind a wall (even with a good stud-finder that can detect metal and A/C current), you should always cut very carefully and not just recklessly start sawing without knowing for sure what’s in there.

A trick I often use when cutting larger holes is to not do it all at once, but start with a small square hole and expand outwards. You don’t want to go too deep with the jab saw on your first small hole to avoid any obstacles inside the wall. Once you’ve got that out, put a finger in there to feel if there’s anything behind there. Expand the hole until you can fit a few fingers and reach a little further, then keep going until you can reach all the way in. You can choose which sides to expand the hole based on what you feel behind there. For example, if you feel the stud an inch from the left side, you can expand the hole further to the right to keep your hole in the proper cavity.

Here’s an example of the progressive cuts I made in a recent project:
progressively-larger-drywall-cuts

The only problem with this approach, aside from taking a little longer, is that you can’t re-use the section of drywall you just cut out. But, in practice, that’s usually not possible anyway since removing the drywall attached to studs (usually glued or nailed on) is a destructive process so you’d need a fresh sheet anyway. Read more ›

Posted by Matt Chiste
January 19

Mounting brackets for low-voltage systems

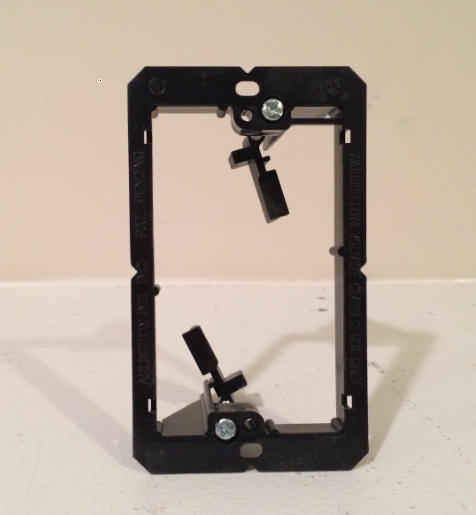
When you install an electric outlet, you’ll need to use a single-gang wiring box, nailed into an adjacent stud, and all wiring connections need to be made inside the box for electrical code and obvious safety reasons. On the other hand, low-voltage systems such as HDMI, ethernet and speaker wire don’t require a box like this, and consequently are easier to install because you don’t need to cut open a large section of drywall to nail the box to the stud. The brackets look like this, with tabs that slide into place when turning the screws on front, securely connecting to the wall via compression:
wall-bracket

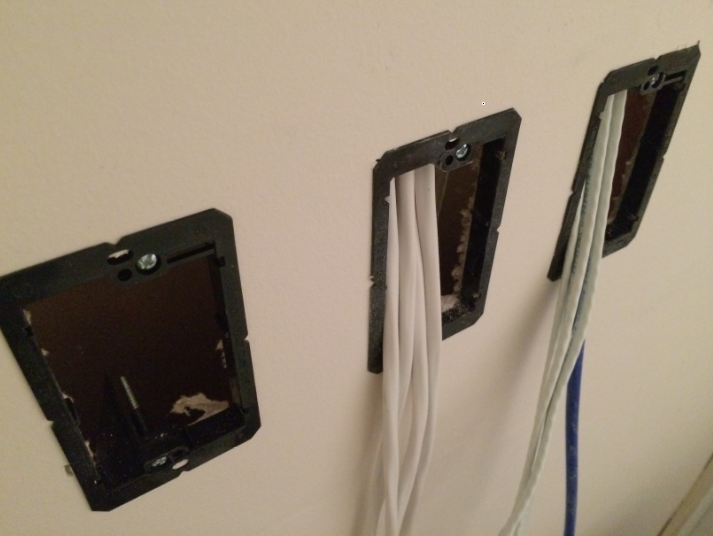
Rather than looking for a stud when installing these low voltage mounting brackets, you’re looking for the space between studs using a stud finder. Making sure there is nothing else like existing electrical wiring behind the wall, you simply cut a hole the size of the bracket, slide it in, and turn the screw to secure the plastic clip to the back of the wall. The end result is a clean wall mount that you can attach any faceplate to:
wall-brackets-installed Read more ›

Posted by Matt Chiste
January 16

Leverage the space between floors for wiring

I’ve written about wiring ethernet between floors before, but during my latest round of home improvements I came across something I hadn’t really thought much about before: there’s usually a ton of space between floors in a house. This space can be really helpful when running cables (power, ethernet, or low-voltage) between floors when the walls don’t line up exactly, since it allows you to run cables horizontally before dropping down into the next wall.

The trick is to cut a hole in the ceiling near the wall you want to run the cable down. Make it big enough to expose the two studs so that you can fit your head and arm in there, and so that you have something to screw the replacement drywall into:
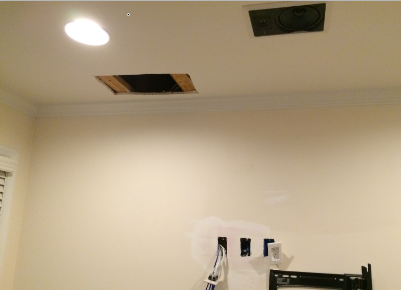
access-to-crawlspace

The idea is that rather than cutting open the wall and drilling up through the 2-by-4s into the ceiling space, you fit your drill through the ceiling hole and drill down. While you should always exercise extreme caution when drilling or cutting, in addition to having horizontal space to work with, this method is slightly safer since it’s unlikely something will be under those horizontal boards. On the other hand, if you’re drilling up, it’s possible there could be something like these copper water pipes sitting directly above the wall:
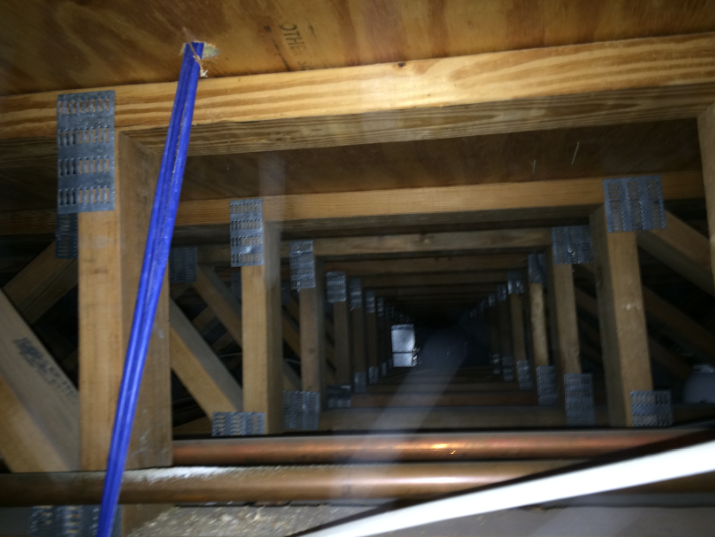
space-between-floors

Once you’re done with the work, you’ll patch up the drywall in the ceiling just like you’ve done with walls. It’s a bit trickier sitting underneath the patch and applying spackle, and a lot trickier when it comes to sanding, but getting a little dirty is just part of the job. Remember to seal the hole once you’ve run the cables to act as a firebreak. Read more ›
Posted by Matt Chiste
January 12

Last minute Christmas gift idea : drones!

Last year I dropped a last-minute gift idea after posting a more comprehensive list for the Home Automation Guru in your life.

It’s no secret that I love me some drones, so this year, I’ve got a couple suggestions for you in all price ranges:

  1. The DJI Phantom 2 Vision+ is likely outside of the price range of the casual gift-giver, but maybe you’d like to treat yourself this year. I’ve got one of these, and while there are more glitches than I’m happy with (having dealt with “flyways” and no longer being able to use first-person video (FPV)) I’m pretty happy with the flight characteristics, range, and video quality.
    dji-drone
  2. Next on the list is the Parrot AR.Drone 2.0, a great indoor (and semi-outdoor) drone that is a pretty slick toy for (mostly) indoor flight. I’ve had a lot of fun with my original A.R. Drone but haven’t yet seen the 2.0 model. I’d put it in the “advanced toy” category and wouldn’t expect it to be able to capture any winter wonderlands, but it’s no doubt a good model to start off with indoors and out.
  3. Next in the list is the Parrot MiniDrone. From the same company that brought us the A.R. Drone, it’s a mini model that’s a fun wall-creeper. I saw these demo’ed last year at CES and they looked pretty slick.
  4. Finally, at the low end are these micro-drones. For 30 bucks it’s hard to go wrong here; their Amazon rating is 4 star and let’s just say that after Christmas some of my family members might be able to help me do a first-person review early next year.

Oh, and don’t forget about using Amazon Prime for free shipping if you’re going to pull the trigger on one of these guys.

Merry Christmas!

Posted by Matt Chiste
December 22
 Subscribe to HomeAutomationGuru.com
    Add to Google Reader or Homepage

Enter your email address to subscribe: