MobiLinc: Control Your Insteon SmartHome from your iDevice or Android

When we kicked off this blog, I told a story about the Home Automation Salesman touting that “Crestron was the Neiman Marcus of Home Automation”. But, hey, we’re Walmart guys, right? More expensive doesn’t mean better – so we chose Insteon. We’ve set up our controller, added devices, and even wrote a simple program.

Now here’s where Insteon starts really separating from the elitist Crestron crowd: Remote Management. Generally, if you’ve got a high-end installer putting Crestron in your home, you’re going to get a bunch of these RIDICULOUSLY over-priced pieces of crap: a Crestron TPMC-8X Isys 8.4-Inch WiFi Touchpanel for $3,800. Almost FOUR THOUSAND DOLLARS for this thing, and it’s features read like a 1990s ad for, well, Windows XP:

  • Stylish and compact ergonomic design
  • 8.4″ active matrix touchscreen display / 16-bit Isys graphics | 800 x 600 resolution
  • Windows XP Embedded operating system
  • Onboard PC applications for Web browsing, streaming media, and remote computer access
  • WAV file audio feedback
  • Includes stylus with onboard storage slot

OK, but I digress. The point is, you already own an iPhone, iPad or Android device, right? Not only do I bet it didn’t cost you four grand for the thing, I bet your post-1999 device ALSO has “WAV file audio feedback”! And, what’s better, there’s this brilliant app called MobiLinc that can turn your device into that fancy-schmancy Crestron control system, AND it will work wherever in the world you are! (fine, I concede it doesn’t make any noise let alone provide “WAV file audio feedback”, but trust me, you won’t miss that.) Otherwise, this app is a fantastic addition to your Insteon-enabled home automation setup. It even works whether you have the ISY994i that I’ve been raving about, or one of the less capable central units like the SmartLinc 2412N
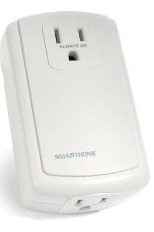
 or PowerLinc 2414 – see their Version Guide for compatibility information.

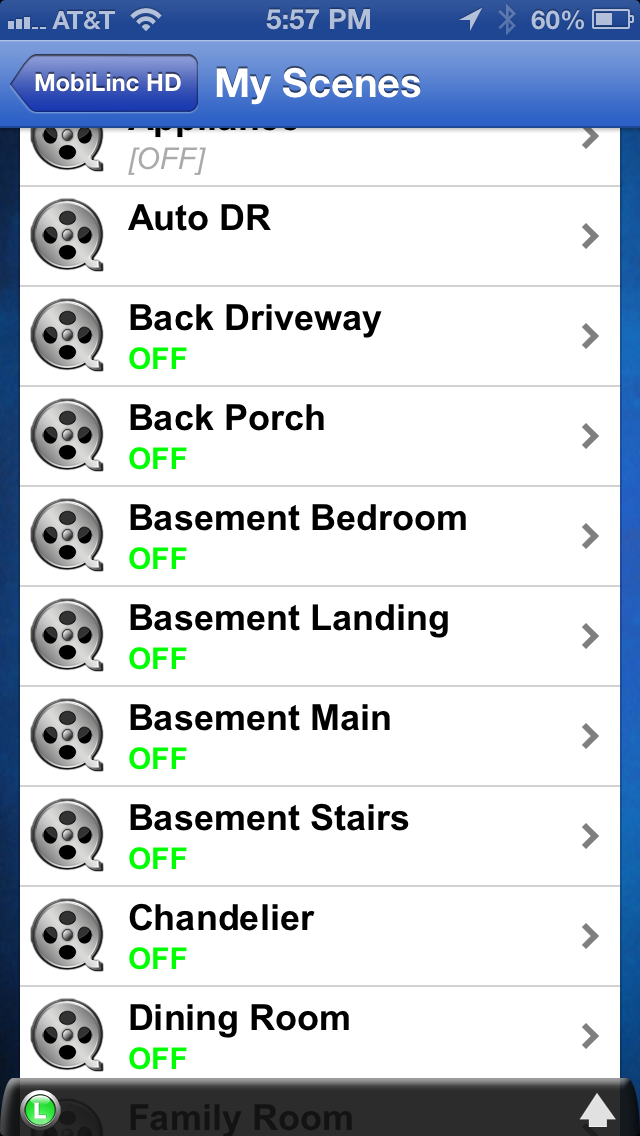
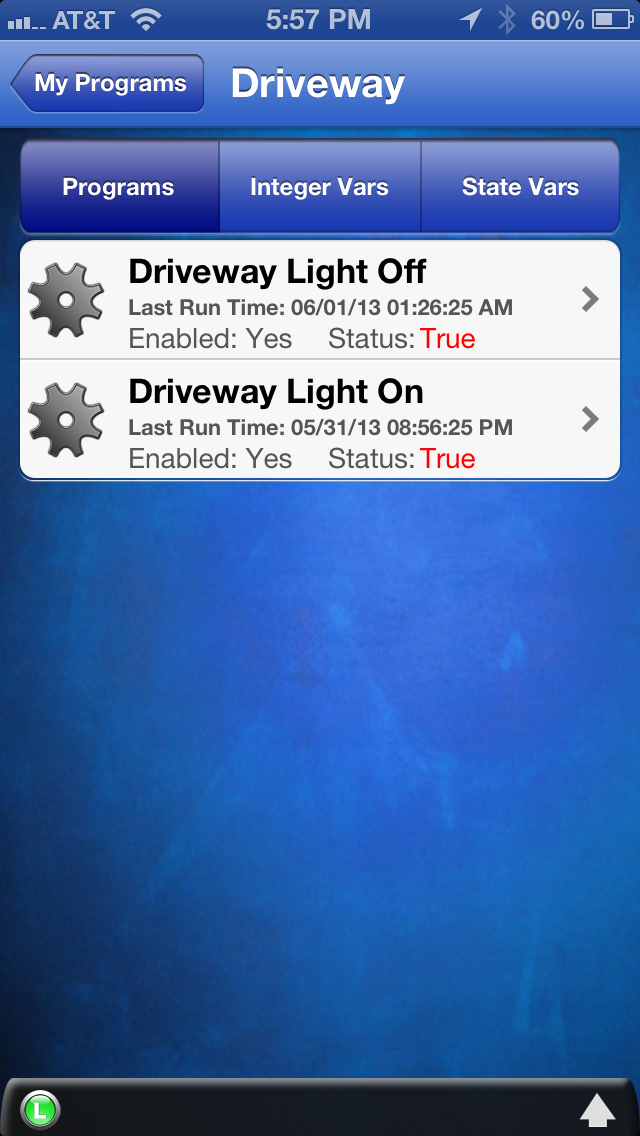
Once you configure the device to connect to your central controller, you can manage all your scenes, devices, thermostats, and security cameras through this app, and it looks great on both phones as well as tablets. It also has a neat geo-fence feature that lets you automate actions based on where you are, but that’s a topic we’ll save for another day. In the meantime, check out the MobiLinc web site and some of the screen shots below from my iPhone and iPad, and check out their apps on the iTunes App Store. I recommend the $50 MobileLinc HD for the iPad with the $5 IP Camera In-App purchase – a pittance compared to that $4,000 monstrosity above.

mobilinc-iphone-1   mobilinc-iphone-2
Read more ›

Posted by Matt Chiste
June 22

Getting Started with ISY-994i Programming

We’ve talked about the Insteon 8 watt light bulb, and how I’ve installed it in a driveway lantern that doesn’t even have a switch connected to it (and how maybe you don’t even need something this fancy). But let’s assume that you do, and you’d like to program your ISY994i to turn it on at dusk and turn it off a couple of hours later.

Once you’ve added your light as a device in the ISY994i interface using this procedure, click on the “Programs” tab at the top, and then “Details” in the second tab row. There you can click “New Folder” to organize your programs, click on the new folder (mine is called “Driveway”), and click “New Program” to start with your first program. As a software coder, the “programming” of the ISY-994i is sometimes disappointing because it’s not a true free-form language like Java or C#. And I’ve also heard from non-coders who tell me that it’s too complicated for them to “write programs”, but I think Universal Devices did a pretty good job striking a balance for both target audiences; I’d be interested to hear your experiences in the comments below.

At any rate, most programs are simple “conditionals” that follow an “if/then/else” structure that coders and non-coders alike should be able to easily grasp. In our case we are going to write two “programs”. The first is going to say, “If the time is 30 minutes after sunset, then turn on the light”. And the second will say “If the time is 5 hours after sunset, then turn off the light”.

For the “Driveway Light On” program, you’ll click on the “If” line in the program, then “Schedule” in the “Add to Program” section. In the “Schedule” Section, you’ll enter a number of minutes, then select “After”, and “Sunset”, then click “Add to ‘If'”. Next, click on the “Then” line, and pick the Insteon scene and state that you want to control (we’ll talk more about scenes and states in another post). Finally, click “Save Changes” under “Manage Programs”, and repeat these steps for the new “Driveway Light Off” program (of course, using different times and the “off” state for your scene). The end result will look something like this:
isy994i-lights-on-at-sunset

You can find more details on Universal Device’s wiki page, Create a Program; there is a lot of great documentation there, and the content is growing all the time. And if you have any questions, feel free to post in the comments below. But, to reach a broader audience – and more importantly, the excellent staff Universal Devices who are always eager to help – check out the UDI Forums. Read more ›

Posted by Matt Chiste
June 20

K.I.S.S. – don’t automate what you don’t have to

The K.I.S.S. Principle is pretty straightforward: Keep it simple, stupid.

While it may be tempting to completely automate everything in your home, sometimes keeping it simple just makes more sense. For example, we’ve covered the $30 Insteon 8-watt light bulb, but for $14 you could get a Light-Sensing Socket Adapter to simply power a regular, $2 incandescent bulb whenever it’s dark outside. Of course, this means your not-very-efficient light would just run all night rather than just a couple of hours after sunset, which can be done with the Insteon bulb. And in addition to using many times more energy, you’d be replacing that incandescent light about 40 times more often than you would be an LED bulb. Still, the simplicity of having a regular photo-sensitive light has its advantages.

Another example is in the bathroom; rather than getting a motion sensor and Insteon Switch for over $100, you could go with a $7 motion activated night light:
motion-sensing-night-light

The point is that you may not even need to completely integrate a specific device with your Insteon system; with a little digging you may be able to get the “automated” results you’re looking for. On the other hand, i can’t turn on my bathroom night light from another country via my iPhone, so, you know, where’s the fun in that?
Read more ›

Posted by Matt Chiste
June 18

Insteon 8-watt light bulb

We’ll spend some time on this blog on LED lights and Green Energy, but now that you’ve been introduced to the ISY-994i, set up synching with an ApplianceLinc, selected your Insteon switch types, and installed a new Insteon switch, let’s take a step back and tackle a simpler problem: what if your light doesn’t even have a switch?

Such was the case with an outdoor light I had which used a light sensor to turn on after dark:
insteon-lamp-post

The old setup was a simple photo-sensing socket adapter that screwed into the light socket, and the bulb screwed into that. But, to save energy, I went looking for an alternative to this 60-watt bulb running all night long. My requirements were simple: use less energy and don’t run the light when it’s not needed.

The solution for my Insteon-enabled home was simple: the (relatively) new and award-winning INSTEON 8-watt LED Bulb. This bulb has all of the Insteon capabilities built into it (although it’s not dual-band), and uses just 8 watts of energy to produce the light equivalent of a 60 watt incandescent. Even better, thanks to some ISY-994i programming, I was able to configure it to run only from “sunset” to “four hours after sunset”. Those are important concepts we’ll cover with future ISY posts, because as summer comes we all know the sun goes down at different times over the year – so this is not your grandmother’s light timer.

The bulb is a little funny looking because of the heat sink at the base, but it definitely does the job, and comes highly recommended!
insteon-8-watt-bulb

Setup is simple: screw in the light and add it to your Insteon network. Later we’ll cover how to program it to turn on when you want it.
Read more ›

Posted by Matt Chiste
June 16

Installing an Insteon Switch

Now that you’ve chosen the switch type that you need for a given application, it’s time to install it. Keep in mind that while you can do this yourself, hiring a qualified electrician is recommended if you’re uncomfortable doing this, as electricity can kill you (or at least, with 120 volts, really, really hurt).

The steps to performing an installation are as follows:

  1. Turn off the power. Don’t forget this one. Any time you’re “in the box” from the moment you remove the switch cover to the moment you put it back on, be cognizant of whether the power is on or not. Unless the power needs to be on so you can test the lines with a multimeter, the power should ALWAYS be off so you can work safely.
  2. Remove the old switch. This just involves removing the faceplate and mounting screws. Inside you’ll likely find a couple of wires connected to the switch with wire nuts; disconnect those and remove the old switch.
  3. Identify the line, load, neutral, and ground wires. This is the hardest part, involving turning the power back on and using a multimeter to test the lines. Generally (but not always), the “line” (power coming from the street) is black and the “load” (the power going to the light) is red. The “neutral” wire – which might not have even been connected to the original switch, but often sits in a bundle at the back of the box – is likely white, and the “ground” wire is the bare metal wire in there. Without getting too technical, the neutral wire is a key component that allows a switch to communicate on the mesh network over the power lines, but some older houses may not have that wire in the switch boxes. However, that doesn’t mean you’re out of luck. It just means you’ll need a switch like the SwitchLinc 2-Wire RF Dimmer (2474DWH), which can still control the light but communicates to other devices wirelessly rather than over the power line infrastructure in the house.
  4. Connect the Insteon switch. Once you have the wires identified, connect them using wire nuts to the labelled wires on the switch.
  5. Mount the switch. Next, you’ll put everything back in the switch box and screw the switch and faceplate back on.
  6. Turn the power back on. After turning the power back on at the breaker, the LEDs on the switch (if they’re the rocker type) should light up.
  7. Test the switch. Now you should be able to use the switch like any other, turning the light on and off.
  8. Add the switch to your Insteon Network. We discussed the basics about this with the ApplianceLinc, but generally it involves holding the switch down to put it in Linking Mode, then adding it to your ISY-994i.

Wiring switches can look messy when they’re pulled out of the wall, but don’t hesitate to really pull those wires out to work on them before jamming them all back in there, and if you’re dealing with more than one switch at a time, do yourself a favor and label those switches before pulling things out:
insteon-switches-line-load-ground-neutral

A helpful video of these steps, by insteonuser, is after the break. Read more ›

Posted by Matt Chiste
June 14

Insteon Switch Options

You’re on your way to setting up an Insteon network in your home! You have your ISY-994i as the central controller, and have set up an ApplicanceLinc to get your feet wet. Now it’s time to start planning for your first wall switch.

Before we get into the process of actually installing the switch, let’s first consider your options. Unlike your run-of-the-mill light switch, Insteon switches are powerful devices that act as a node on your mesh network, so you have quite a few options depending on what you plan on using for the switch, what features you want, where you plan on installing it, and what load it will be powering.

This was something that I didn’t really have a grasp on when I started, and in hindsight I over-payed for some switches in my house (for example, by installing a high-load dimming switch on a 3-way circuit when the switch didn’t need to have the load or dimming capabilities). So let’s take a look at the available options, and the questions you should ask yourself for each and every switch you plan on installing.

Appearance: What do I want the switch to look like?
Insteon switches come in two basic types, and many different colors. The first question you should ask yourself is whether you want a “toggle-style” switch or a “paddle-style” switch.

insteon-toggle-switch
Toggle Switch
insteon-rocker-switch
Paddle Switch

Some people like the toggle-style switches because they’re easier to see from a distance whether the switch is “on” (up) or “off” (down). But, with Insteon, you shouldn’t choose them for that reason. Neither of these switches physically stay in the up and down position – you just push them up or down and they return to center without indicating on or off. Only the paddle style has a visual indicator of the state of the switch – which you can see by the little LEDs next to the switch, not the actual position. Because they can indicate the state of the switch visually, I recommend the paddle-style switches. For example, suppose you have a basement light with a switch in the Kitchen to control it. The paddle-style switch will give you an indication of whether the light is on or not, even if you can’t see the light itself. On the other hand, some people prefer the toggle-style simply for aesthetic reasons or they find it’s easier to “feel in the dark”, say in a bathroom in the middle of the night.

Finally, consider that many switches have various color options, such as white, almond, ivory, brown, or black, to match your home decor.

Read on for more switch features… Read more ›

Posted by Matt Chiste
June 12

ApplianceLinc: Your First Step Towards Home Automation

Every journey begins with a first step. Now that we’ve set up the heart of our system, the ISY-994i, it’s time to start adding devices. Before we start replacing light switches or doing any complicated wiring, we can start with a basic device that simply plugs into any available outlet and powers the attached device (such as a lamp): the Insteon ApplianceLinc.
insteon-appliancelinc

The first thing to keep in mind when developing your home automation projects is that generally devices can be Controllers, Responders, or both. For example, the ApplianceLinc is a Responder because it responds to control messages and scenes, and switches are Controllers because they send the actual control signals. But, as we’ll soon see, switches also have indicator LEDs to show if they’re on or off – which means that in addition to being controllers, they are also responders.

But let’s not get ahead of ourselves. For now, we’re going to set up the ISY-994i as a controller (technically, it’s the PowerLinc Modem that’s the controller, but we won’t split hairs), and the ApplianceLinc as the responder.

The key to setting up any device is to link it with another one (this is a great generalization that we’ll cover in future posts about scenes and linking). There are several ways to do this, but generally you start by putting the device into “Link Mode” by holding down the SET button (all Insteon devices have one) until you hear a beep or see the LED flash. Once the device is in link mode, you can add it to your ISY-994i by selecting “Link Management: New Insteon Device”:
isy-new-device
Read more ›

Posted by Matt Chiste
June 10
 Subscribe to HomeAutomationGuru.com
    Add to Google Reader or Homepage

Enter your email address to subscribe: