Now that you’ve chosen the switch type that you need for a given application, it’s time to install it. Keep in mind that while you can do this yourself, hiring a qualified electrician is recommended if you’re uncomfortable doing this, as electricity can kill you (or at least, with 120 volts, really, really hurt).
The steps to performing an installation are as follows:
- Turn off the power. Don’t forget this one. Any time you’re “in the box” from the moment you remove the switch cover to the moment you put it back on, be cognizant of whether the power is on or not. Unless the power needs to be on so you can test the lines with a multimeter
, the power should ALWAYS be off so you can work safely.
- Remove the old switch. This just involves removing the faceplate and mounting screws. Inside you’ll likely find a couple of wires connected to the switch with wire nuts
; disconnect those and remove the old switch.
- Identify the line, load, neutral, and ground wires. This is the hardest part, involving turning the power back on and using a multimeter to test the lines. Generally (but not always), the “line” (power coming from the street) is black and the “load” (the power going to the light) is red. The “neutral” wire – which might not have even been connected to the original switch, but often sits in a bundle at the back of the box – is likely white, and the “ground” wire is the bare metal wire in there. Without getting too technical, the neutral wire is a key component that allows a switch to communicate on the mesh network over the power lines, but some older houses may not have that wire in the switch boxes. However, that doesn’t mean you’re out of luck. It just means you’ll need a switch like the SwitchLinc 2-Wire RF Dimmer (2474DWH), which can still control the light but communicates to other devices wirelessly rather than over the power line infrastructure in the house.
- Connect the Insteon switch. Once you have the wires identified, connect them using wire nuts to the labelled wires on the switch.
- Mount the switch. Next, you’ll put everything back in the switch box and screw the switch and faceplate back on.
- Turn the power back on. After turning the power back on at the breaker, the LEDs on the switch (if they’re the rocker type) should light up.
- Test the switch. Now you should be able to use the switch like any other, turning the light on and off.
- Add the switch to your Insteon Network. We discussed the basics about this with the ApplianceLinc, but generally it involves holding the switch down to put it in Linking Mode, then adding it to your ISY-994i.
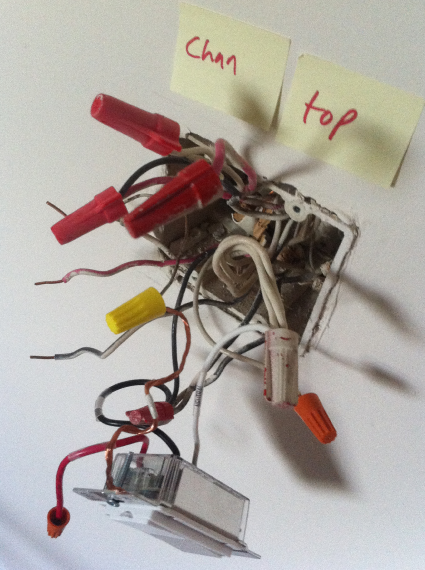
Wiring switches can look messy when they’re pulled out of the wall, but don’t hesitate to really pull those wires out to work on them before jamming them all back in there, and if you’re dealing with more than one switch at a time, do yourself a favor and label those switches before pulling things out:
A helpful video of these steps, by insteonuser, is after the break.


