Mount a Deck Umbrella to Save Space

We have a small deck that needed a bit of sun coverage over the summer, and went shopping for an umbrella. We decided on this 10′ Patio Hanging Offset Umbrella with Solar LED Lights; it looked like it would get the usual “center pole” that most patio umbrellas have out of the way, and the LED lights would be an added bonus to provide a little extra light at night.

Turns out the LEDs are a bit of a gimmick; they’re visibly lit and produce a little bit of extra light, but not so much that you wouldn’t need any other light source if you were, say, having a BBQ dinner under it at night. And that overhang design is pretty neat until you consider the mechanics of it – it requires a pretty large base that itself occupies a lot of deck space to prevent it from toppling over:
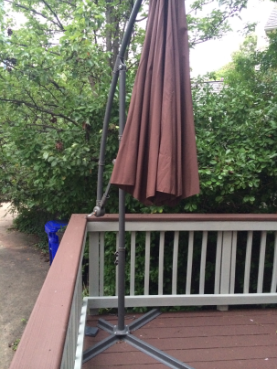
umbrella-with-stand

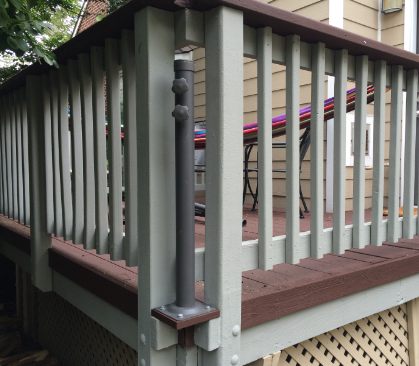
I tried relocating the umbrella to different areas of the deck, until I realized the obvious: I don’t need to use the feet at all if the umbrella base is properly supported. Specifically, those metal bars acting as the feet are attached to the vertical base with 4 bolts. Rather than bolting the base to the feet, I extended an OUTSIDE corner of the deck by a couple inches, painted that to match the rest of the deck, and bolted the base directly to the wood:
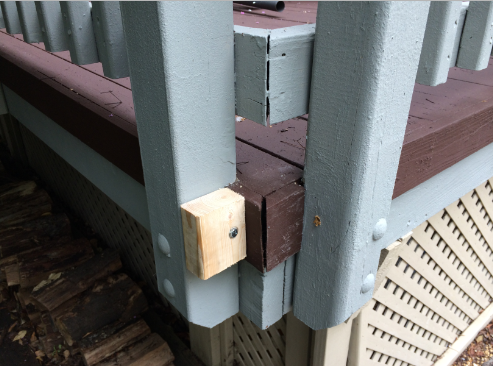
umbrella-mount-footer umbrella-mount-installed Read more ›

Posted by Matt Chiste
October 24

Glow In The Dark 3D Printing

Halloween is just around the corner, and with a 3D printer you can make some neat decorations that can be downloaded from Thingiverse. This year, I tried something new: Glow in the Dark Plastic!

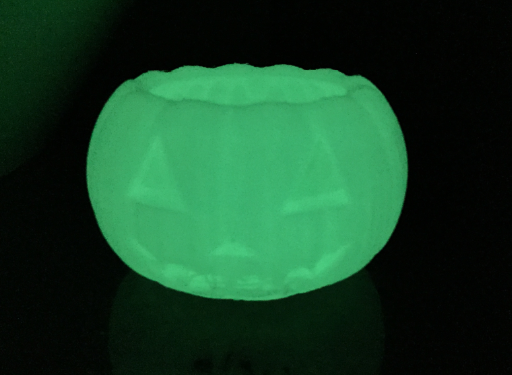
The filament isn’t cheap, but it works pretty well; like most glow-in-the-dark materials it requires a light to “charge up”, but placed in a dark room it’s visible from a pretty good distance. This picture doesn’t really do it justice in a pitch black room, but hopefully you get the idea:
glow-in-the-dark-pumpkin

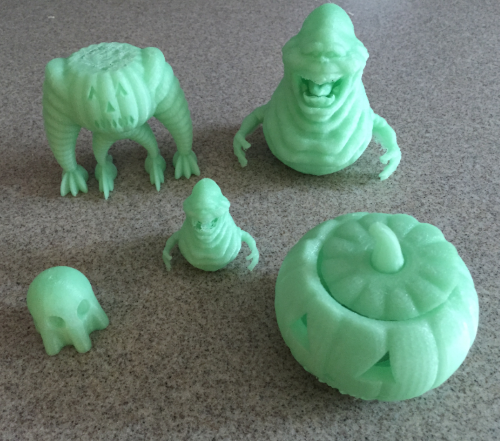
Here’s a collection of my favorite pieces that I’ll link to below:
halloween-3d-prints Read more ›

Posted by Matt Chiste
October 20

The miracles of spray paint

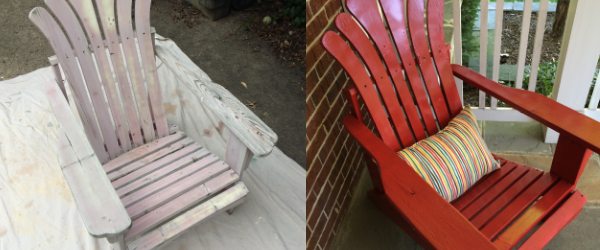
OK, so this one’s not strictly speaking “home automation”, but it does fall under “home improvement“. I’ve always thought of spray paint as the tools of the trade for (graffiti) artists, but when faced with either spiffing up or throwing away some old patio furniture, I was really surprised how well a couple of cans of spray paint can make some old furniture look almost like new. I didn’t even bother with sanding or prepping some wood furniture that had seen better days, and was very happy with the results:
spray-paint-chair
Read more ›

Posted by Matt Chiste
September 17

Make your garage more comfortable with a motion-sensing fan

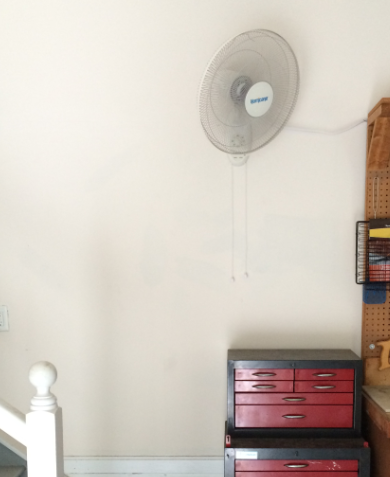
I do a lot of work in the garage, and Virginia summers can be hot, so I found a quick and easy solution: install a wall-mount fan in the back of the garage:
garage-fan
I was a little worried that this guy would be too small to get any significant cooling out of it, but even on the low setting it does a great job of keeping the area cool (and ventilating things like gasoline and paint smells). The wall mount unit has a neat feature with pull strings on the bottom to control fan speed and oscillation, so if you mount it high on the wall you can still control the features without having to reach for the knobs.

Of course, this wouldn’t be complete without adding some Insteon automation to the mix. So I used an Insteon Motion Sensor and Insteon On/Off Module to activate the fan whenever motion is sensed.
Read more ›

Posted by Matt Chiste
September 14

Leverage existing in-wall wires for low-voltage power

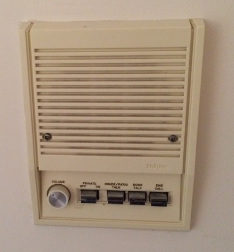
When I moved into my house, it had an old 1980s-style tape deck intercom system that I replaced with a custom Home Command Center. That meant the intercom units on the walls were basically just non-functional eye-sores:
old-intercom

Recently I received a photo frame as a gift, and considered mounting it on the wall somewhere, but of course would have to deal with getting power to it. In looking at the intercom, I saw the perfect fit: the intercom system already had power and speaker wires coming from the central console – so I could pull the power from the central location rather than having to drop the power cord into the wall and plugging it in elsewhere.

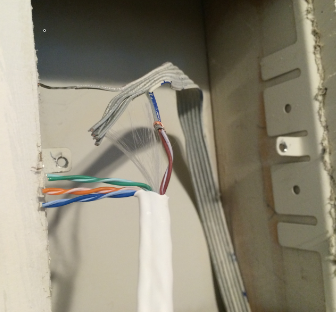
After removing the intercom, the first step was to run a cable from the central console to the wall unit so that I could identify which wires connected to which. The trick was connecting the cable to the wires on one end, then using the continuity feature on a multimeter to figure out which wire was which on the other end. In my case, I used an ethernet cable to test multiple leads at once:
intercom-wires2 Read more ›

Posted by Matt Chiste
September 10

Automatically lock your doors when you leave home with MorningLinc and Insteon

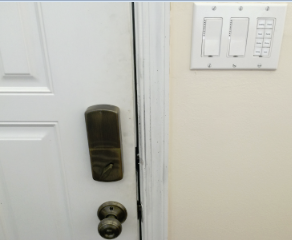
We’ve covered a myriad of things based on how you can make your Smart Home smarter based on your location information, but one we haven’t touched on yet is locking your door. We’ve already got a Morning Industry deadbolt, a MorningLinc Insteon controller to activate it, and a hidden door sensor to detect the state of the lock, so we just need to write a quick program to automatically lock the door when we leave the house, using MobiLinc’s geofence feature.
geofence-door-lock Read more ›

Posted by Matt Chiste
September 2

Install a garden hose spigot anywhere with a custom-length hose

In working on an automated sprinkler system, I started with the very basics: getting water where I wanted it. We’ll talk about the sprinkler system in an upcoming post, but the first thing I wanted to do is to get a garden hose spigot up on the deck by the BBQ grill and fire pit. The basic ingredients are pretty simple, but the key thing to this hose-based system is that you don’t have to worry about the actual length of the hoses, as you can make them yourself with any length of hose and a clamp-fit male or female garden hose repair kit. The steps are:

  1. Use a hose splitter at the original water source, typically on the side of the house.
  2. Measure and cut an existing garden hose to length between the source and where you want to connect the new spigot.
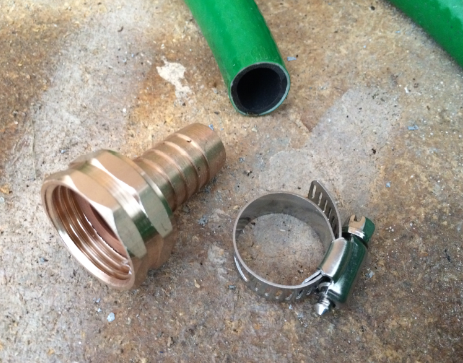
  3. Slide the clamp over the cut-off piece of hose, then insert the appropriate connector into the hose itself; slide the clamp up and tighten it with a screwdriver.
    custom-length-hose
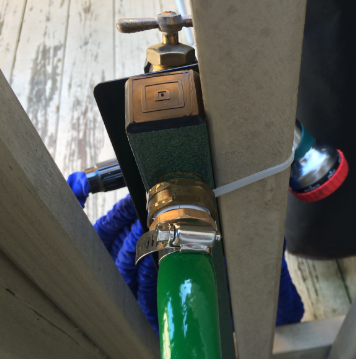
  4. Connect the end of that extension hose to the back of a hose bib extender and mount it as desired; in my case I used common zip ties to attach to the railing of the deck:
    garden-hose-extension-back
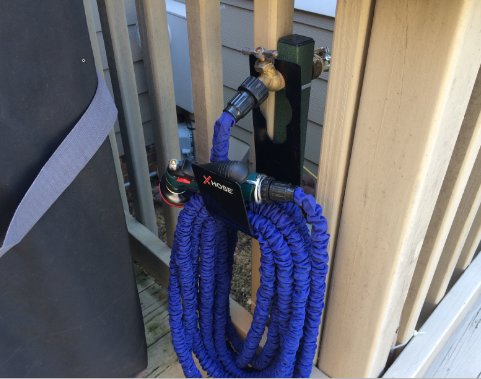
  5. Now, depending on your watering needs, you could use an expandable hose, mounting bracket, and spray nozzle to finish the setup of your new, more conveniently located spigot:
    garden-hose-extension

Read more ›

Posted by Matt Chiste
August 29
 Subscribe to HomeAutomationGuru.com
    Add to Google Reader or Homepage

Enter your email address to subscribe: