Now that we’ve determined ethernet offers much better download speeds than wifi, how do we make it happen? There’s a great article on Instructables (via LifeHacker) covering some high-level topics, and I encourage you to check that out. I’ll try not to simply repeat all those steps here, but offer some alternatives on my particular installation.
Wiring a two-story house with a basement wasn’t easy, but with some drywall-patching experience, running cables between floors is possible. I have cable service coming in from the street into the basement, so that’s where it made the most sense to install the cable modem (the in-house coax cables are pretty shoddy, so avoiding them allows the cable modem to get a stronger signal). There’s a Wi-Fi access point down there, and a CAT-7 cable that runs up two floors into the attic, then back down to a closet where another Wi-Fi access point is set up, along with a switch and some other gear. The TV on the main floor and office also have hardwired connections – more than one to the TV room to cover the other electronics in the entertainment system.
Dropping a cable down from the attic to the next floor is pretty straight-forward, and covered in that Instructables post. But when traversing more than one floor, some drywall surgery is necessary because you need to be able to access the joints between floors. This isn’t as hard as it sounds; basically you cut a hole large enough to fit a drill in and drill a 1-2 inch hole into the 2×4. Remember that because you’ll be patching the hole in the wall, smaller is not necessarily better – give yourself plenty of room to work with.
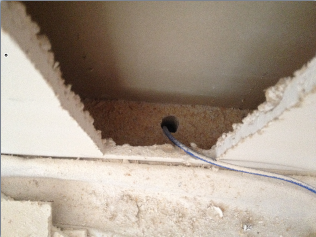
Use a coat hanger to fish the wire through on the other side, and tack your cables to a stud to keep them neat and out of the way in case there is any future wall cutting. Note that you’ll want to keep these cables away from power lines in the walls, and if you do have to intersect a wire carrying live current (say to an electric outlet), try to cross the wire at a 90 degree angle to prevent interference on the line. Also keep in mind that there is a gap of up to 16 inches between floors, so you’ll need to drill holes from both the top and bottom on each level. Before sealing things back up make sure to spray in some fire-break foam in the hole, which will prevent the wall cavity from acting like a mini-chimney.
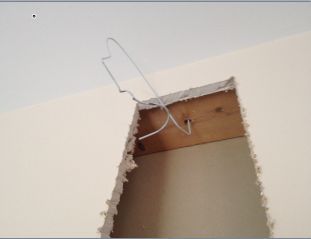
You may find that the walls don’t line up when going between floors; depending on the orientation of your floorboards this might not be too much of a problem. After drilling down from the floor above, I cut a small hole in the ceiling to find the hole inside the wall from the floor above.

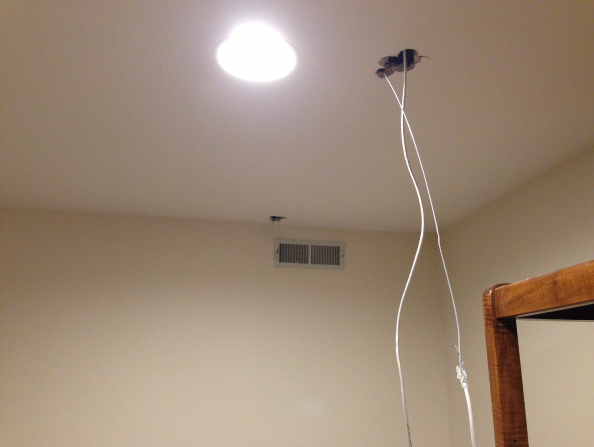
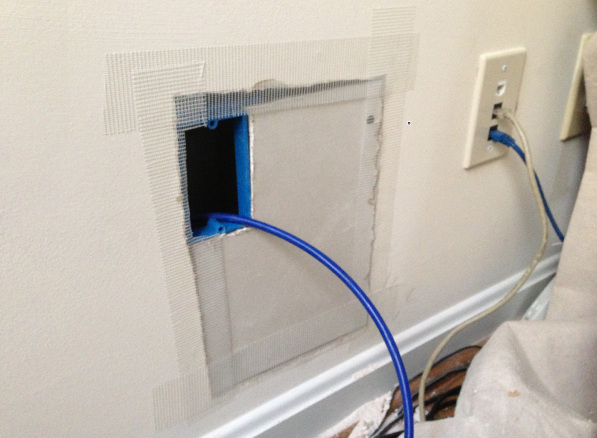
Using a coat hanger I was able to thread the ethernet cable through the space and over to another small hole in the ceiling, where I was able to continue the path down the far wall. Fortunately the floor joists went the correct direction; if they went the other way I’d have had to cut open a much larger hole, and drill horizontally through each floor board, which would NOT be fun.
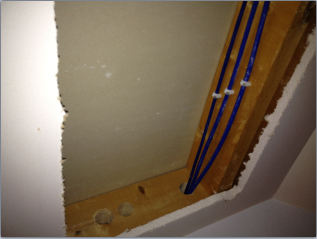
Finally, you’ll install a 1-gang box and use some KeyStone connectors, then patch up all the drywall. Here you see one set of ethernet ports already installed, with another cable coming in from another location (yes, I could have put them all in a single 4-port wall plate but they were done at different times.)
As always, use caution when cutting into walls or drilling through floor joists; you never know what’s on the other side of those things! During my project I only had a single near-miss to a PVC water pipe, but piercing that would have been catastrophic. Not to mention if it would have been a gas line or power cable…
Equipment you may need:
- Jab Saw
– for cutting the drywall.
- Long, Large (at least 1 Inch) Drill Bits
– you may be drilling through at least 2 2×4’s in those floor studs, so you’ll want the bits to be reasonably long. And since you’ll be running cable through there, they’ll need to be pretty wide as well
- CAT6 Ethernet Cable
– I generally recommend Cat6 at least (if not the unofficial Cat7 cable) since these things aren’t going to be very accessible in the walls, and I’ve had a bad experience in the past with “cross-talk” where a cable line was running too close to a power line. The higher the number, the more shielding there is to avoid this type of interference.
- Ethernet Crimp Tool
– This isn’t strictly necessary if you buy the proper length wire, but you can find longer lengths much cheaper, then cut them to size and add your own connectors.
- Platinum Tools 100010C EZ-RJ45 Cat 6+ Connectors, Clamshell, 50-Pieces
– if you’re planning on cutting your own cable lengths, I suggest these guys. They’re a little pricier but easier to use because you pull the individual wires through the front.
- Borescope
– this also isn’t strictly necessary, but it’s nice to be able to insert a camera into the hole you just drilled to see what’s on the other side. That’s how I discovered the “near-miss” on that water pipe.
- Coat Hanger – for pulling cable between floors and wall spaces.
- Fire-Retardant Sealing Foam
– you’ll spray this stuff in the holes in the floor joists after dropping the cable to re-seal the hole. This prevents the hole from becoming a fire hazard, and insulates the hole against air leakage.
- Single Gang Low Voltage Mounting Bracket
– this bracket will hold the wall plate in place on the drywall, and doesn’t need to be nailed or screwed to a stud.
- Keystone Wall Plate and Connectors
– These come in a variety of configurations, with the wall plates having 1, 2, 3, 4, or 6 empty ports that you click in whatever connector you need – in this case it would be RJ45 Inline Keystone Couplers
, but the neat thing about this modular setup is that you could have, say, two ethernet ports, an HDMI port, and a Coax port all in one wall plate by your home entertainment system.
- Tape, spackle, putty knife, paint – for patching up the drywall that was cut open.


I am a big fan of the MoCA (ethernet over coax) adapters.
If you have FIOS your router can act as one end point so you only need to buy one more for like $50 dollars if you only have one more location. If you don’t, you could always just buy another one and plug that into your router.
Most haves have COAX already all throughout the house so you don’t have to drill holes.
You are not going to get 1 GB ethernet speeds, but honestly do you really need that? Seems most use cases would be streaming video from a nas or some other media server so you don’t really need ridiculous speeds.
I agree though WIFI sucks…I am curious to see how 802.11ac works out but I am not excited about replacing 3 routers….
Omid, Yes, MoCA is an option, as are Powerline adapters to send network signals over the existing power lines in a house. While I haven’t personally tried MoCA, the Powerline adapters I tested out didn’t have great bandwidth either – but you’re right that they were adequate for streaming movies and other light network activities. Stay tuned for an upcoming post on other uses for these ethernet cables.
Interested to see where you go with the next articles. I think MoCA tops out at ~50 MBps ?
It is funny after I wrote why would you want to transfer files I found myself 2 hours later trying to copy a file from my file share onto my iPad….
You need an edit button on this site for people like me who are unable (alright unwilling) to read their post before posting 🙂
Done! You should be able to edit your own comments for up to 5 days now.