If you’ve been keeping up with tech news lately, you’ve likely heard quite a bit of controversy about 3D-printing lately. But you’ve also probably heard about how 3D printing is the next industrial revolution. The MakerBot Replicator 2 is one of the top consumer 3-D printers out today. It’s not exactly cheap, but for the cost of a high-end desktop computer you, too, can be part of this revolution. I have the first-generation MakerBot Replicator, and wanted to share some thoughts on it since I have actually designed and “printed” objects that I’ll be featuring in some upcoming projects related to Home Automation.
- Printing is not incredibly easy or fast. I thought I would just plug this thing and it would be as simple as an ink-jet printer to print out parts. While it is reasonably straight-forward to connect and print designs (either downloaded or custom-made), these things can be finicky. Without the proper build plate leveling, application of the kapton tape, and ensuring proper adhesion, you’re likely to end up with more than a few messes where the plastic misses its mark and just extrudes all over. It took me more than four tries to print out a simple outlet cover – each at about 30 minutes to an hour before “finishing”:
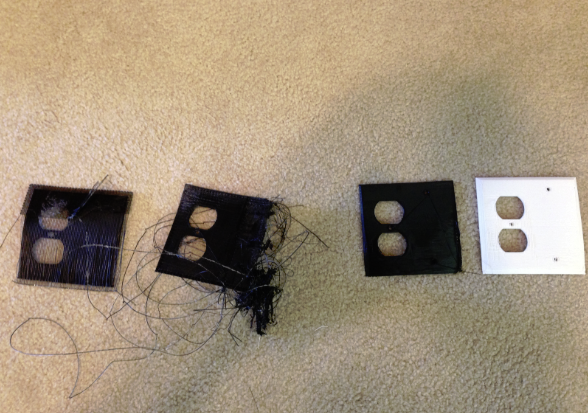
- Complexity is still limited. 3-D printed guns (regardless of how the American Public perceives them) are actually pretty simple devices – basically a strong tube with a firing pin at one end. While the promise of being able to print a fully-functional cell phone looms on the horizon, the reality is that the current technology typically uses only plastic and extrudes small strings of plastic one layer at a time – which means you can’t even print things with sharp overhangs on it, because there’s nothing beneath it to support it. Still, the printing of individual gears (not complex moving moving machinery) and other small things like outlet covers is still possible.
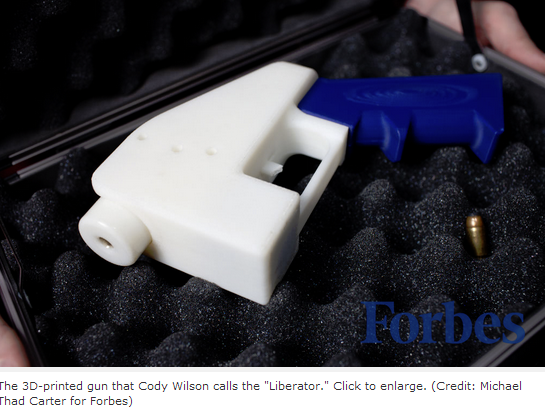
(Image credit: Forbes)
- Plan on downloading existing components from Thingiverse first. Thingiverse has been hailed as the Wikipedia of 3-D objects, and even if you don’t have a 3-D printer it’s fun to browse all the awesome things people are making and submitting to the site to share and collaborate on. If you do have a printer, your first reaction might be to start modeling your own designs first, but it’s much easier to just download some objects to kick the tires first. Yoda is a great example of the kind of detail you can get out of these things – and also a great example of something that would be insanely difficult to do yourself:
- Buy a good caliper. For under $20, you can get a decent caliper
to measure the objects and spaces you’ll eventually be designing.
- Find the right 3d design software. I “kissed a lot of frogs” before finally settling on AutoDesk’s 123D Design. Your mileage may vary, but I was surprised at how hard it was to find decent software that also happened to be, you know, free. You’ll also need the free MakerWare software to actually send the prints to the Replicator.
- Do regular maintenance on the Replicator. MakerWare has a pretty comprehensive FAQ, and even published a great video on how to apply the kapton tape, clean the stepstruders, and lube the rods:
- Prevent warping with an acetone slurry. I ended up with a lot of warped and messed up objects because they weren’t sticking to the build platform. Credit to TechShopJim for showing me the way with his Instructables post, which involves using a thin slurry of acetone and used plastic on the build platform to keep things stuck.
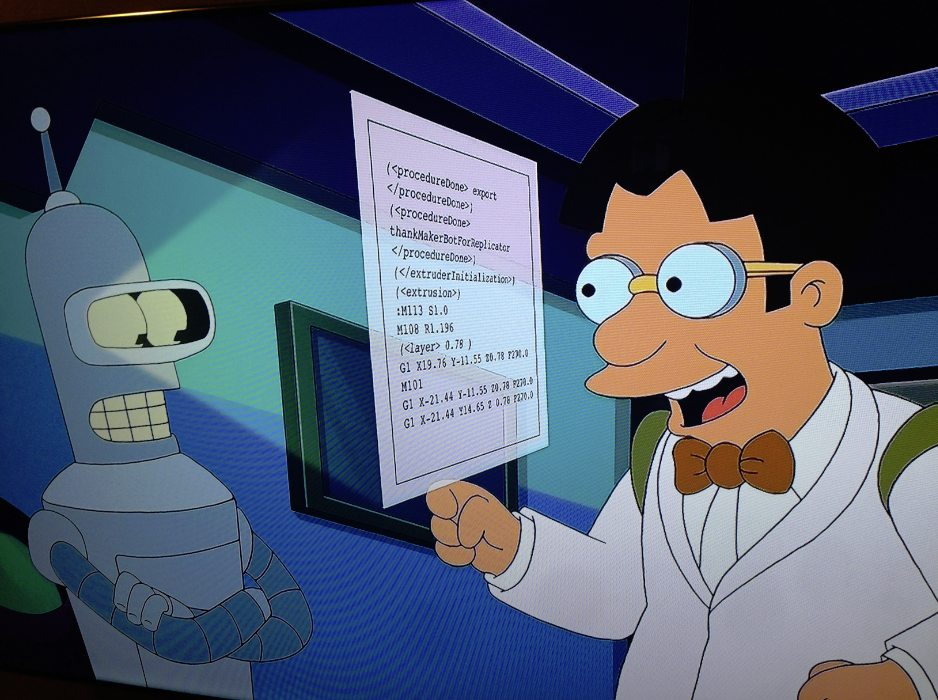
Update 7/9/2013: Apparently MakerBot will be around in 1,000 years – Bender gets a full explanation of how 3-D printing works, and there’s even a little nod to MakerBot – notice the “ThankMakerBotForReplicator” gag in there?