Now that we’ve taken a look around the I/O Linc, let’s see how these guys can be used in practice. Today’s exercise will focus on getting your doorbell integrated into your Insteon home automation system. Why, you ask? Because once your doorbell is wired to your home automation system, all sorts of things are possible – including:
- getting text messages on your phone when your doorbell rings,
- flashing a light when the doorbell button is pressed,
- logging the times that the bell rings (and taking different actions based on the time of day),
- sounding the doorbell even if the doorbell button isn’t pressed to provide audio feedback for various events, and
- triggering other events like getting a picture of who’s at your front door with your security camera.
These are all topics that we’ll be discussing soon, but let’s start with the physical setup.
The first thing you’ll need to do is assess whether you can access the wires for your existing doorbell chime. If your chime is located high on a wall somewhere, you may need to do some drywall work to get those wires near an electric outlet because you’ll need power for both the I/O Linc as well as the new Doorbell Chime
transmitter. Fortunately for me, my doorbell wires landed in my 1980’s intercom system so I had easy access to the leads as well as power when I replaced the old system with my home control command center.
The location for the I/O Linc and transmitter needs to be near where those wires terminate, but note that the chime component itself (the receiver) can be plugged into any outlet in the house and will receive the “ring” signal wirelessly. In fact, you can even have multiple chimes in different locations in your home by plugging in additional add-on receivers.
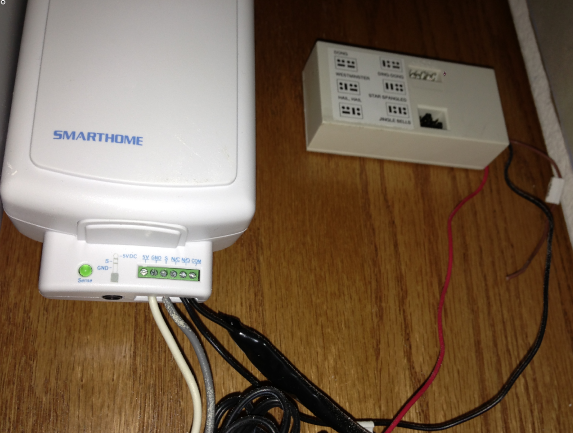
Once you’ve got the leads from the doorbell near an outlet, you’ll wire them into the GND (ground) and S (sense) terminals of the I/O Linc. These are the input signals, which means that when the doorbell button is pressed, the circuit is complete and a signal is sent out on the Insteon Network that this input is “on”. Next, you wire the transmitter up to the outputs – specifically the N/O (“normally open”) and COM (common) terminals. Now, when this I/O Linc receives a signal from the ISY-994i, it will “close” this circuit, telling the transmitter to send a signal to the actual chime itself. Here’s what the “transmitting” side looks like, from the doorbell leads (grey/white wires) to the I/O Linc, with the output connected to the door chime transmitter:

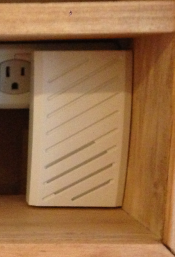
The receiver simply plugs into any outlet – in my case into a power strip in the home control command center:

Of course, you could have just connected the doorbell leads directly to the wireless transmitter and skipped the step through the I/O Linc, but then the network would have no way of knowing when the doorbell was pressed. Wiring through the I/O Linc presents a tiny problem, though: the I/O Linc won’t automatically close the output terminals when the input terminals are closed (i.e., the doorbell button is pressed), so we need to write a quick program in our ISY-994i. After adding the I/O Linc to the network, we’ll write a program using steps similar to what we did with the Insteon Motion Controller. Specifically, the code will look like this:
If
      Status 'Sensor-Door Bell' is On
Then
      Set 'Output-Door Bell' 100%
Simple, right? We’re just saying that “when the doorbell is pressed, turn on the output so that the transmitter will send the signal to the door chime receivers”. This program will grow over time to incorporate other doorbell hacks, but this should get you started with making your home automation system “doorbell-aware”.


Does anyone make make a chime for an Insteon system to replace my X10 chime?
Thanks,
Roland
Roland, the Extend-A-Chime linked here should replace any standard door chime system; it just uses a “contact closure” system to trigger the chime, which presumably is what your X10 chime is doing. If you want to integrate it with the Insteon system, the I/O Linc sits between the button and the chime – when the doorbell is pressed, the I/O Linc detects the contact closure, sends a signal on the Insteon network, then triggers a contact closure to the chime to actually sound the ring.
Hope this helps!