While I was installing my home command center, I also took the opportunity to replace my existing thermostat with an Insteon Thermostat (well, technically a slightly older-looking model
).
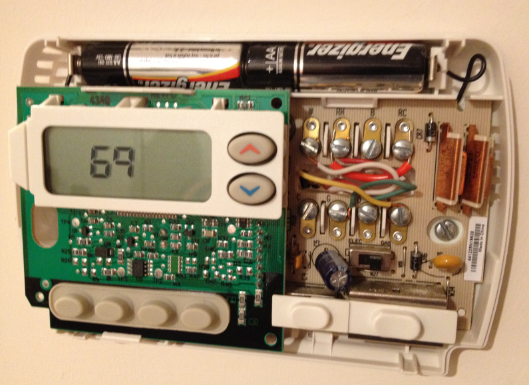
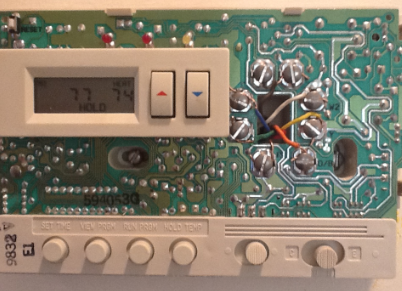
Wiring these guys up is pretty straight-forward: you simply pop the cover off the existing thermostat and note where all the wires are connected. Both of my thermostats were different, but generally you’ll see that there are letters for each lead that will correspond to the letters in your Insteon thermostat, with different colored wires for each, so it’s a one-to-one mapping:
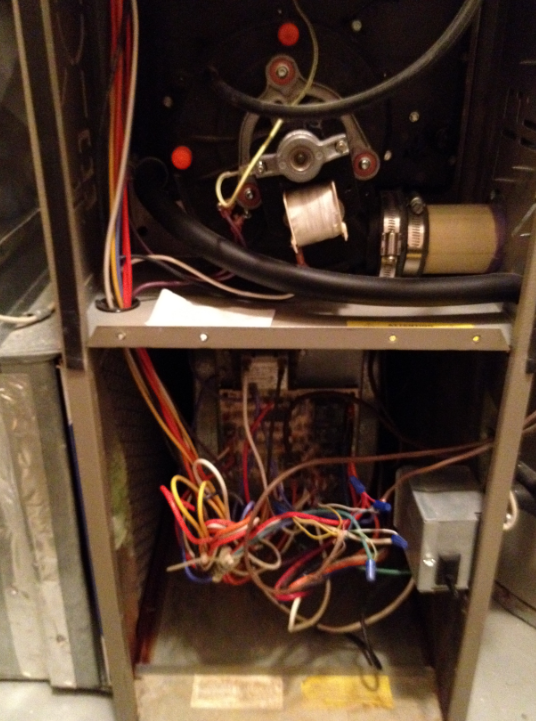
I ran into a problem with one of my thermostats, though, that didn’t have a “Common” wire running to it. The product page indicates this can be resolved with the Add-A-Wire kit, but when I looked at the wire bundle coming into the thermostat, I saw an extra lead in the bundle that simply wasn’t connected to anything. So, I took the cover off my furnace where the bundle terminated, and found the other end of that wire. From there, I simply connected the extra wire to the frame (for the ground), and used that wire to connect to the common lead on the thermostat. The moral of the story is that the Add-A-Wire kit is only necessary if you actually don’t have any spare wires in the bundle.
This was early on in my home automation efforts, so initially I had asked the HVAC guy to install the thermostats – and he couldn’t get it to work. Turns out that my particular A/C unit required a setting to be changed from “Gas Electric Operation” to “Heat Pump Operation” (page 12.2 of the manual). So make sure you read the manual on the proper configuration of the thermostat even after you’ve wired it up.
Some take-aways from all this:
- Identify the type of your HVAC unit – there are different kinds such as heat pumps, millivolt systems, dual fuel, and multi-stage systems.
- Read the manual before buying a thermostat to ensure compatibility with your type of HVAC unit. Note that the Insteon Thermostat doesn’t work with heat pump systems so you’ll need to go with the Venstar model.
- Feel free to experiment a little, but use caution as improper wiring can cause havoc with your A/C or even potentially be a fire hazard
- Remember to add your device to your ISY-994i so that it can be programmed later (we’ll cover this soon).
- Speaking of being able to program your thermostat through the ISY-994i, keep in mind that you do NOT need a programmable thermostat here because the programming will all be done through the central controller. For example, I made the mistake of getting the $214 7-Day Programmable Venstar
, when in hindsight I could have saved a couple bucks with the 1-Day Programmable model
(although, as you’ll see from that second link, it appears that Amazon no longer carries the 1-day model), since the scheduling of different states is much easier done through the ISY-994i
- Because these devices are wireless only (there is no A/C power line to plug into), you’ll need to have a Dual-Band device such as a switch nearby to allow communication to the rest of the network.
- Finally, keep in mind that with the Insteon Thermostat, you can actually get wireless, remote temperature sensors
to monitor the temperature in different places where there hadn’t previously been a thermostat, such as the basement. This doesn’t mean you’ll magically have a new heating or cooling zone in your house, but can offer new insight into your temperature distribution, or even do things like say “keep the living room at this temperature during the day, and the master bedroom at this temperature at night”.


