Earlier this week we walked through the design of a plastic replacement part for a snowblower, and someone asked the question: “Couldn’t you just buy a replacement part for much less cost and effort?”. First, in some cases this would be true, but in this particular case, my neighbor searched high and low for the part and couldn’t find one. So a commercially available part may not always be an option, or you may truly need something custom. The cost part of the question got me thinking, though: how much did this thing actually cost to actually print? Turns out that very dense part was under $2 in variable costs (plastic and electricity), and way too much in fixed costs. Here are my calculations.
Plastic
The plastic known as PLA filament used by the MakerBot varies in cost, but figure around $40 for a 1kg spool. So how much did that part cost me in plastic? Using a cheap digital scale
, I came up with a weight of about 44g including the raft (the build platform the object is printed on):
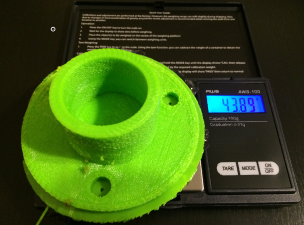
So, that’s a surprising 4.4% of the spool, which works out to about $1.76 per object, with the ability to print about 22 of them per spool. This is definitely on the high side cost-wise because I used a very heavy amount of “infill” for this part, using much more plastic by making it less hollow than the default setting.
Electricity
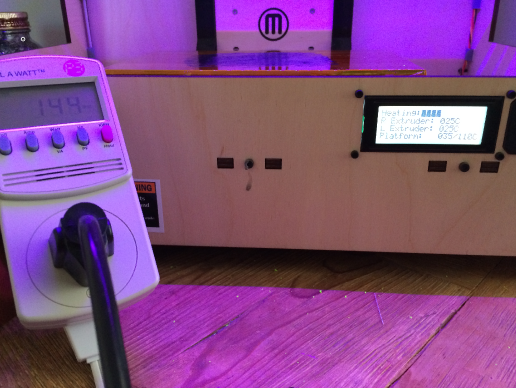
The MakerBot works by melting that plastic filament and shooting it out of an extruder, while moving motors to position the head and lower the build platform. So it has to use a lot of electricity, right? Turns out, not really. I used a Kill A Watt meter to monitor power consumption during heating and printing, and saw ranges from about 140 watts during heating to 180 watts during full printing. The entire print used about .59 kWh, which means it burned about 7 or 8 cents of electricity.
MakerBot
By far the biggest expense is the MakerBot itself. The MakerBot Replicator 2 currently runs over $2,000, but there are other 3D printer options
available for significantly less. To calculate the per-print cost here, you’d need to identify the base price as well as maintenance costs, then divide it by the total number of prints you’ll get out of the lifetime of your device. Unfortunately I can’t even hazard a guess on this in my case, and since it’s a sunk cost I’ll leave it to you to figure it out for your situation.
Time
Another tough-to-quantify expense is the amount of time you spend with it. Downloading a part from Thingiverse.com takes almost no time, while designing a part from scratch can take a couple hours. And then once you send the part to the printer, be prepared to wait for a LONG while. That snowblower part took about 3 hours to print, and while you don’t actively invest time in the process, it’s still a good idea to occasionally check on the print to make sure nothing is going wrong.


