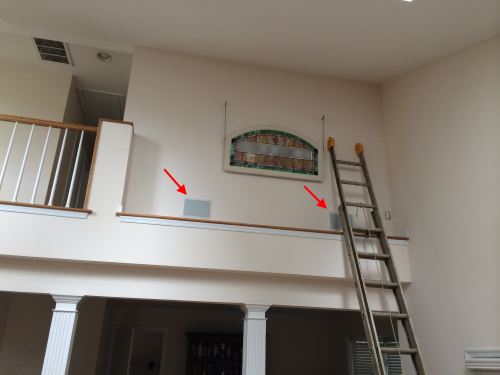
We’ve already covered installing ceiling speakers in these pages, so I won’t go into great detail on the process of physically installing in-wall speakers – it’s a virtually identical process to installing them in the ceiling. However, if you’re installing on an interior wall, you may have a different set of challenges, such as wiring across studs (where you have to remove a lot of drywall to get the speaker wire through).

Some things to keep in mind when installing wall-mounted speakers:
- If you’re mounting the speakers on an outside wall, keep in mind that the wall cavity will have insulation in there. You’ll want to install the speakers while removing as little insulation as possible. Even compressing the insulation a bit is better than removing it completely (something I did installing my safe in an outside wall), but still not ideal. You should try to leave it as “fluffy” as possible behind the speaker without getting in the way.
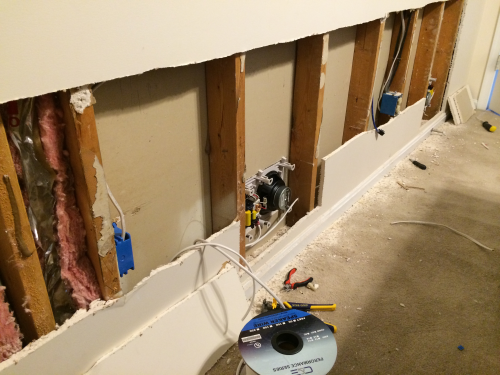
- If you’re mounting the speakers on an inside wall, consider whether it’s easier to open up the OTHER side of the wall to run the speaker wires. For example, I have high slanted ceilings in my living room so I went with wall speakers for the room. To run the speaker wire through the studs, I cut open the wall behind the speakers to make the drywall repair simpler from ground level on the back of the wall:

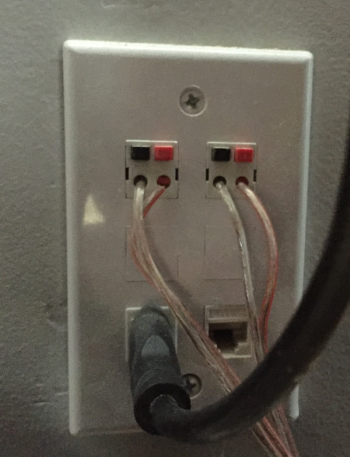
This made it easier to deal with the installation of the speakers from the ladder, and no drywall repair was needed on that side of the wall. - For a cleaner look connecting the speakers, you can use a Keystone wall jack; here I’ve got jacks for both wall speakers, and a pass-through connector for HDMI and ethernet going to the projector on the other side of the wall:


